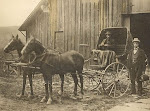
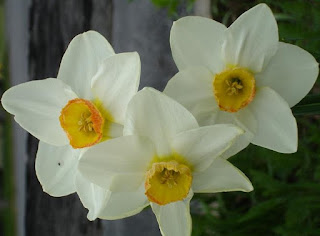
These beautiful vintage images were found on Pinterest. If you are not familiar with this site... be warned at how addicting it is! If you would like to visit my Bird Board, you may find it here
Sunday, April 3, 2016
Sunday, March 20, 2016
Spring
What better way to usher in the Vernal Equinox than to include some sentimental quotes from John Burroughs
To see the fire that warms you, or better yet, to cut the wood that feeds the fire that warms you;
to see the spring where the water bubbles up that slakes your thirst and to dip your pail into it;
to see the beams that are the stay of your four walls and the timbers that uphold the roof that shelters you; to be in direct and personal contact with the sources of your material life; to find the universal elements enough; to find the air and the water exhilarating; to be refreshed by a morning walk or an evening saunter; to find a quest of wild berries more satisfying than a gift of tropical fruit; to be thrilled by the stars at night; to be elated over a bird's nest or a wild flower in spring- these are some of the rewards of the simple life.
I go to nature to be soothed and healed, and to have my senses put in order.
Oh, Spring is surely coming, her couriers fill the air; each morn are new arrivals, each night her ways prepare; I scent her fragrant garments, her foot is on the stair.
I still find each day too short for all the thoughts I want to think, all the walks I want to take, all the books I want to read, and all the friends I want to see.
Monday, March 7, 2016
Gluten-Free (or not) Buttermilk Pancakes
When my grandchildren are here overnight or after school, it never fails that they request pancakes for supper, breakfast, or BOTH! Needless to say, we go through a lot of maple syrup, as well!
This recipe is my old standby... I can only imagine how many hundreds of pancakes I've flipped over the years for my four children and these two grands combined. We've also used the rare leftover pancakes as a base for ice cream sandwiches (or cones) in a pinch!
Because we go through so many pancakes, I make a large batch (16 cups) of dry pancake mix, which I keep in a half-gallon glass jar. I simply add my wet ingredients to a measure of the dry, and we can have pancakes in no time flat! (no pun intended)
First, the pancake recipe...
Gluten Free Buttermilk Pancakes
(to make non-gluten free pancakes, use the same amount of all-purpose flour and omit the xanthan gum)
Preheat a greased griddle over medium-to-medium-high heat on your stovetop
In a bowl, combine
1 and 1/2 cups GF Flour Blend
1 teaspoon Xanthan Gum
1 and 1/2 Tablespoons Sugar
1 and 1/2 teaspoon Baking Powder
1/2 teaspoon Salt and
1/2 teaspoon Baking Soda
Stir well, then add
1 large Egg
1 and 1/2 cups Buttermilk
(NOTE: if you don't have Buttermilk, simply add 1 Tablespoon of vinegar to 1 and 1/2 cups of milk and allow to set for a couple of minutes to curdle)
3 Tablespoons Vegetable Oil
1 Tablespoon Vanilla Extract
Mix gently til all is incorporated, but do not beat. Drop by spoonfuls onto preheated griddle (we prefer silver-dollar size pancakes) Let cook for a few minutes til bubbles begin to appear on pancake surface, then flip and cook for another few minutes til golden brown and set.
Repeat with remaining batter. Serve buttered with Maple Syrup and/or Raspberry Jam.
To make your own
Gluten-Free Dry Pancake Mix
sift and mix together well in a large bowl
12 cups GF Flour Blend
(or regular All-Purpose Flour)
2 Tablespoons Xanathan Gum
(omit if using regular flour)
1 cup Sugar
1/3 cup Baking Powder
2 Tablespoons Salt
2 Tablespoons Baking Soda
Store in a glass jar with a tight-fitting lid.
To make a small batch of pancakes, mix together
1 cup of Dry Mix with
1 large Egg
1 cup Milk with 1 teaspoon Vinegar added
2 teaspoons Vanilla Extract
2 Tablespoons Vegetable Oil
*NOTE*
{I use a simple homemade gluten-free flour recipe blend for most all of my baking needs, to which I add 1/2 teaspoon of Xanthan Gum per each cup of GF flour used in a given recipe. I mix together equal amounts of brown rice flour, sweet white rice flour, tapioca starch and potato starch. I purchase each in 5 pound bulks through the buying club/co op I run, and dump them in a 5 gallon food-safe tin, mixing very well}
Sunday, February 28, 2016
Making Kombucha
I LOVE Kombucha! Either plain or flavored, this fermented tea is a delicious way to quench your thirst. And, it's very easy to make a batch, or in my case... two!
The ingredient list is short, and the recipe is simple. You'll need a scoby (often referred to as a mushroom, though it isn't really a fungus!), well water (or distilled water), organic sugar, and a combination of organic green and black tea. You will also need to purchase a cup or so of plain, unflavored raw kombucha from a health food store or grocer. I get Aqua Vitea Kombucha | Kombucha on tap in kegs and in bottles brewed in Vermont on tap at Healthy Living in Wilton, NY or Middlebury CoOp in Vermont.
Unless you know someone who makes their own kombucha, you may have a hard time finding a scoby. For the record, scoby stands for Symbiotic Colony Of Bacteria and Yeast. It's a bit time consuming, but you can grow your own, and it will continue to grow and provide you with a jarful if you feed it and keep it healthy.
To grow your own scoby, purchase about a cup of kombucha. It is important to get plain,unflavored, raw kombucha; do not use the kinds with colorings, flavors, or chia seeds in it.
Once you've purchased the kombucha, you're ready to start the process of growing a scoby. In a stainless steel pot, bring about 1 and 3/4 quarts of distilled water to a steady boil over medium heat. Then, turn heat off and stir in 1/2 cup organic sugar; mix til it's all dissolved. Next, add 2 bags of green tea and two bags of black tea, and let brew til the water reaches room temperature. Remove the teabags, squeezing gently, and in a half-gallon sized glass jar, pour the kombucha in and fill the remainder of the jar with the cooled tea-and-sugar mixture. Make certain, the tea has cooled to room temperature... do not pour hot tea mixture in or you will kill the kombucha ferment!
Cover the top of your jar with cheesecloth, secure with a rubber band, and let sit in a warm, draft-free space in your kitchen, undisturbed, for 3 to 5 weeks. When your scoby first starts forming, it will be very thin... it tends to look like a scum forming on top of the tea. Just leave it and it will continue to grow. When it is about 1/4 inch thick, you can use it to make another batch of kombucha.
To make a gallon of new kombucha when you already have a scoby and about a cup of purchased starter kombucha, bring 3/4 of a gallon of water over high heat to a strong simmer. Remove from heat, stir in 1 cup of sugar, and steep 3 green tea and 3 black tea bags in the hot sugar water. Let mixture cool to room temperature. Gently squeeze out teabags. Place your scoby and about 1 cup of starter kombucha in a 1 gallon glass jar (no plastic!) Carefully pour the cooled sweet tea into the jar. Cover with cheesecloth and secure with a rubber band. Set in a warm draft-free spot on the counter and let ferment for a week or two... until the tea is fizzy and pleasant to taste. Some folks like to ferment it til it's less sweet and very fizzy and somewhat strong; I prefer it mildly fizzy and still somewhat sweet. (The fermenting process eats up most of the sugar) When it tastes good to you, remove the scoby and pour your finished kombucha into a glass pitcher, cover and refrigerate.
Now, you can do two things here; if you want to start another batch of kombucha right away, remember to reserve about one cup of kombucha to add to your newest batch. (You won't have to keep purchasing store-bought kombucha if you do this!)Simply follow the directions again for making kombucha above. If you don't want to make another batch right away, place your scoby in a glass jar and barely cover it with some of the kombucha you made. Add about a tablespoon of sugar to it and mix gently. Store in the fridge until you want to make more kombucha.
Or, if you want to grow a bigger scoby, keep this jar on your counter and feed it about a teaspoon of sugar every week or two. The scoby will grow thicker, and you will be able to peel it into layers. Each layer becomes a new scoby to share! Soon you will be overrun with scobys; I store them all in one jar, covered with kombucha, and try to remember to feed them a teaspoon of sugar now and then. I've read that folks dehydrate their excess scobys and give them to their dogs like jerky treats; I have not yet tried this.
You can also flavor your finished kombucha; however, don't try to flavor it as it's fermenting... wait til the process is complete. I love adding ginger pulp to my pitcher of kombucha in the fridge. I've also cut it with a bit of grape or pomegranite juice. Experiment, and have fun! Cheers!
Monday, February 22, 2016
Friday, January 29, 2016
Subscribe to:
Comments (Atom)


