Tuesday, January 27, 2015

Homemade Peanut Butter Cups


Homemade Peanut Butter Cups

In a (makeshift) double-boiler, over medium-low heat, carefully melt
1 cup of Chocolate Chips with about a
 half-teaspoon of Coconut Oil


While the chocolate is tempering, stir together in a small bowl
1 cup of Peanut Butter (smooth or crunchy)
*note: If you don’t have a sweet tooth like I do, you can simply use just the peanut butter… they’ll still taste good!*
 approximately 1/2 cup Raw Honey, if desired
½ teaspoon Sea Salt, if desired
1 teaspoon Vanilla Extract, if desired


Line a mini muffin pan with paper liners. To assemble the Peanut Butter Cups, spoon about a half-teaspoon of the melted chocolate into the bottom of each liner. Use the tip of the spoon to spread the chocolate across the bottom and a little bit up the sides… don’t fuss, perfection is not in my vocabulary.


Next, scoop out a rounded teaspoonful of the peanut butter mixture and plop it onto the chocolate. Then dribble more melted chocolate on top of the peanut butter mixture to cover it nicely. Rap the pan firmly on the counter once or twice


Finally, if you prefer, you can sprinkle the tiniest amount of Himalayan Pink Sea Salt on top of the still-soft chocolate, then place the tray into the refrigerator til firm.
I’ve also made these on a larger scale using regular muffin pans and liners, but I think these are the perfect size.

Monday, January 26, 2015

Friday, January 23, 2015

Gluten Free Old Fashioned Banana Bread


Old Fashion Banana Bread (Gluten Free)
(if you’re not gluten sensitive, the written recipe in the photograph below is non-gluten free)


 Preheat oven to 350 degrees and butter a bread pan. In a large bowl, cream together
1/3 cup Butter
3/4 cup Sugar
2 Eggs
1 Tablespoon Vanilla
1/2 teaspoon Almond Extract is nice, too... up to you!
3 to 4 mashed ripe Bananas
1 Tablespoon Vinegar
1/3 cup Greek Yogurt


Combine well, then gently mix in
2 cups Gluten Free Flour Blend
1 and ½ teaspoons Xanthan Gum
I teaspoon Baking Soda
1 teaspoon Cinnamon


If desired, stir in
3/4 cups chopped Walnuts


Pour into your bread pan and bake for about 50-60 minutes, til browned and set in the center. Let cool before cutting. This freezes well too… I cut into slices, put 2 or 3 in a zip-lock baggie, and place in the freezer.


I often bake this in 4 mini loaf pans instead of one large pan. To be honest with you, the center is not always completely baked in the large loaf pan. If you use smaller pans, adjust the baking time to 25 to 35 minutes.

Wednesday, January 21, 2015

Make Your Own Nut Milk


Homemade Nut Milk
Making your own nut milk is very simple, and you get to control what goes into it. I prefer both almonds and cashews, as I love the creamy texture that cashews lend. If you prefer a sweet nut milk, simply add 2 or 3 pitted dates to the nuts you will soak overnight, process right along with the nuts, and then after you strained the milk, add a teaspoon or so of vanilla extract. It takes longer to soak the nuts than it does to make the milk, so the night before you want to make it, measure out

2 cups of raw, unprocessed Nuts (either all one kind or an assortment of almonds, hazelnuts, cashews, brazil nuts… some folks even toss in a good handful of oats or sunflower or pumpkin seeds.) Remember, use RAW, not roasted. I prefer 1 cup almonds and 1 cup cashews

Place the nuts in a bowl (large enough to allow the nuts to expand as they’re soaking), cover with cold water and place refrigerate overnight.
The next day, strain the liquid and rinse the nuts. Dump half of them into your blender, add about 3 cups water, and process on the highest setting for 3-5 minutes. (I use my old Vita-Mix; the time will vary from blender to blender, as will how fine the nut/water mix will be)


When all is finely processed, strain the mixture through several layers of butter cloth or cheesecloth.


Repeat this process with the remaining pre-soaked nuts.
When everything is strained to your liking, pour all of the strained nut milk back into your blender, add a pinch of sea salt and a pinch of xanthan gum, and process for another minute or two. (This is the time to add the vanilla, if you are using it) Then pour into a glass jar or pitcher, cover and refrigerate. This will last for up to 5 days, so unless you drink a lot of almond milk, it’s best to make every few days to prevent spoiling.


As for the leftover pulp, you may freeze it and use in smoothies, add a tablespoon or two to your bread or cookie recipe, dehydrate it and use in a gluten-free recipe in place of almond flour, or feed it to your chickens.

Friday, January 16, 2015


The Farmer

Before the open grate he sits,
and watches the embers glow;
outside the winds of winter
drift high the frozen snow.

Content is he, this farmer,
for done is the work today.
His family at his fireside,
his children at their play.

His cattle snugly sheltered,
the season's work is done,
His toil throughout the summer
a competence has won.

Heaped high the lean-to shed
with knot, with stick and splinter,
whose captive heat and ruddy glow
defy the blasts of winter.

He craves those pleasures not
that city-wise are sent,
for his family and his farm
make up his heart's content.
Frank H. Craig, Waits River, Vermont 1928

Thursday, January 15, 2015

Lip Balm Recipe


Lip Balm Recipe
(Makes about 18 tubes)

In a (makeshift) double-boiler.
over med-low heat, melt together


4 Tablespoons Vegetable Oils of your choice
(I used 1 Tablespoon Sweet Almond Oil, 1 Tablespoon Coconut Oil and 2 Tablespoons of some Comfrey and Plantain Oils I had made this summer)
1 Tablespoon grated Cocoa Butter
3 Tablespoons of grated Beeswax (or Beeswax Pellets)
1 and ½ teaspoons pure Aloe Vera Gel


Remove the inner part of the boiler containing the melted oils from the heat (keep the water ON the heat still, as you may have to re-melt it depending on how quick you are at pouring the melted ingredients into the tubes!)


Stir in the contents of
1 Vitamin E capsule and
20 to 30 drops of Essential Oils of your choice
(today, I used about
15 drops of Orange Essential Oil and about
18 drops each of Frankincense and Helichrysum


Now, carefully fill your lip balm tubes or tins, let set til cool, and it’s ready to use. As with any lip balm, do not store in a warm or sunny place. Homemade Lip Balm tends to be softer and less waxy than store bought, so keep that in mind when you apply to your lips!


Wednesday, January 14, 2015

Butternut Squash Soup with Apples and Greens (and Gluten-Free Biscuits)

Yesterday was spent in Middlebury, Vermont with my friend Barb. It was pretty chilly… the high of the day was 4 degrees. But the bright sunshine and warm company more than made up for a cold winter’s day! I had errands to run, as I always do when I make a trip up there. We first stopped at Retro Works, a re-use center/thrift store that serves the community well. Barb had some things to donate, and then we shopped through the offerings of books, household items, glassware, linens, clothing, kitchenware, puzzles and games, craft items, furnishings, etc.
Next, we headed to Middlebury Natural Food Co-Op. We grabbed a bite to eat, picked up a few groceries, and continued on our way to Paris Brothers Feed. I needed birdseed to keep the birdfeeders stocked in this frigid weather, and oyster shells for the chickens. Lastly, I had to stop at Depot Farm Supply to pick up organic cracked corn and scratch feed for my assorted poultry. We drove home through a part of the small Amish community in Whitehall, New York. It was nice to get away, and I think Barb enjoyed the trip, too! (And she tolerated my driving past my turn-offs several times very well; I cannot drive and talk at the same time!) I do appreciate the area where we live, but I also love Vermont and New Hampshire, and am glad they are but a short drive away.
Needless to say, this morning was spent unloading bags of seed and feed, and taking care of all the birds, wild and domesticated. Before I headed outside, I roasted a butternut squash. When I came back inside, I started a pot of soup.


Butternut Squash Soup with Apples and Greens
First, you need to roast your squash for an hour or so. I take the whole squash, prick the fatter seed end with a fork, and roast it at 325 degrees. Then I remove it from the oven, cut it in half, and let it cool for 10 or 15 minutes, so I can remove the skin and seeds.


In a pot over medium heat, add
 2 Tablespoons of Olive Oil
2 diced Red Onions
4-6 Cloves of chopped Garlic
Saute for a few minutes, then add
2 peeled, cored chopped Apples
2 chopped Carrots
1 peeled, chopped Potato
1 chopped Red Bell Pepper
The roasted Butternut Squash


2 handfuls of Greens, chopped or torn into small pieces
(I used Kale, Spinach and Collards)
1 good spoonful of Miso Paste
Pinch or two of Sea Salt
1-2 teaspoons ground Cinnamon, or to taste
1 teaspoon ground Ginger, or to taste
1-2 teaspoons ground Turmeric, or to taste


Add enough water to barely cover the vegetables in the pot, stir well and often, and let cook for a few hours till everything is soft and fragrant. Keep adding enough water to keep everything barely covered, so the soup doesn't stick to the bottom of the pot.


To finish the soup, remove from heat and stir in
1 can of Coconut milk
You may eat immediately if you like chunky soup. I prefer to run a stick blender through mine to make it smooth. The choice is yours.


When the soup has cooled, I ladle into small snack-size zip-lock bags, and store flat in my freezer.


Now, I like biscuits with my soup, so I’ll include my recipe


Gluten-Free Biscuits
In a small cup, mix together
1 Tablespoon (or 1 packet) Active Dry Yeast
1/3 cup warm Water
Set this aside to “foam” while you continue with the recipe
In a bowl, sift together
2 and ½ cups Gluten Free Flour blend
1 and ½ teaspoons Xanthan Gum
1 teaspoon Baking Powder
½ teaspoon Baking Soda
½ teaspoon Salt
2 Tablespoons Sugar
With the back of a fork, mash in
½ cup Shortening
Mix until the shortening has combined with the dry ingredients to resemble a coarse crumb. Now add the reserved yeast and water mixture and
1 cup of Buttermilk (or 1 cup milk with 1 teaspoon Vinegar added)
½ cup shredded Cheese (Cheddar, Asiago, Parmesan… whatever)
Blend well, but don’t overbeat, or they’ll be tough!
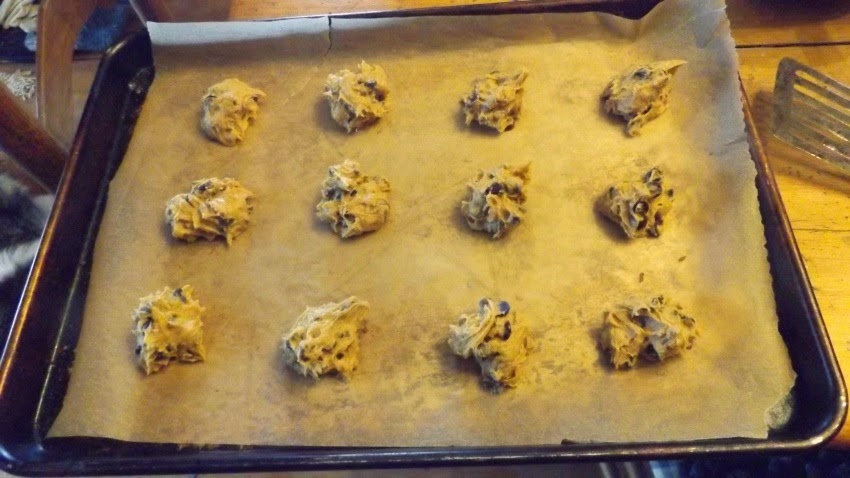
You can pat the dough out and cut with a biscuit cutter, then let rise for 15 minutes to a half-hour, or do what I do. Simply scoop out golf-ball sized pieces onto a parchment-lined or oiled pan, and bake at 350 degrees for 10-12 minutes.


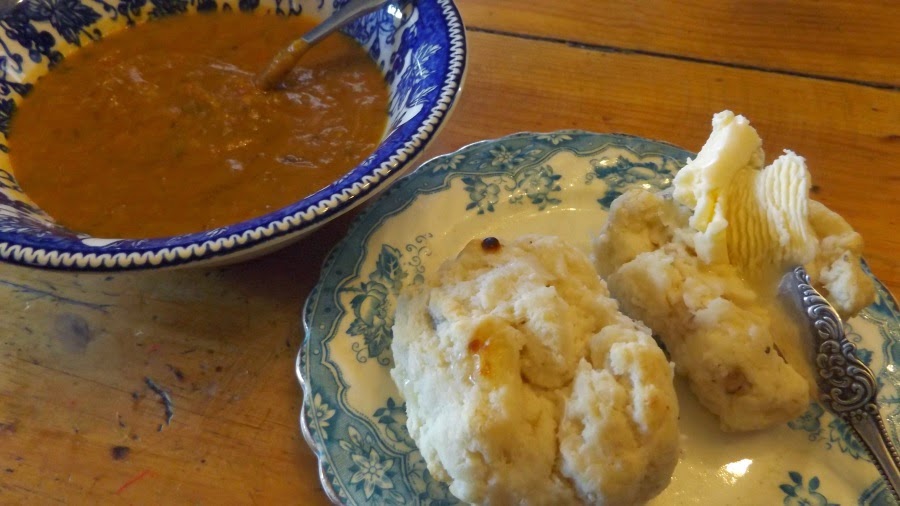
I only baked 2 biscuits in a very tiny pie tin, as you can see. I scooped the rest of the dough into a small pan and froze the unbaked biscuits and put them into zip-lock bags. That way, I can bake 1 or 2 when I want them.


You can bake the biscuits and then freeze them, but from my experience and personal taste, they are dry and crumbly when baked, frozen and re-heated. I much prefer to freeze the dough and bake them when I need them.


These biscuits make a very good breakfast biscuit with egg and cheese, or served fresh out of the oven and spread with Maple Butter or Honey Butter!

Monday, January 12, 2015

Gluten Free Chocolate Chip Cookies


A soft snow is falling today and the temperature is hovering close to the 30-degree mark. Tomorrow’s high is expected to be 11 degrees… quite a change from this brief “warm-up”! I stacked another load of firewood in the cellar yesterday, and today I baked the batch of cookies I never got around to doing then.


My Gluten Free Flour Blend is pretty basic… equal measures of organic Brown Rice Flour, Sweet White Rice Flour, Potato Starch and Tapioca Flour. I buy 5 pounds of each from my buying club, sift it all together and store in a big lard tin under the cupboard. The cost averages around $2.00 per pound… pretty cheap for an organic gluten free flour mix. I use it for everything I bake… cakes, cupcakes, breads, pancakes, cookies, pie, and so on. (For every cup I use, I add a half-teaspoon or so of xanthan gum.)


Gluten-Free Chocolate Chip Cookies

Preheat your oven to 350 degrees, and cover your cookie sheet with parchment paper.
In a bowl, combine
1 cup Butter (or 1/2 cup Butter AND 1/2 cup vegetable shortening)
1 and ½ cups Sugar
1 Tablespoon Blackstrap Molasses (note: I don’t buy brown sugar anymore, as it always gets rock-hard before I use it all. For me, it’s easier to make it as I need it. For example, if you need 1 cup of brown sugar, take 1 cup of white sugar and blend in about a Tablespoon of Blackstrap Molasses using a fork and mash the molasses into the sugar) For this recipe, I don’t bother mixing the molasses and sugar…
2 Eggs
1 Tablespoon Vanilla Extract
½ teaspoon Sea Salt
Beat together all ingredients thoroughly til light and creamy. Then add
2 and 1/3 cup Gluten Free Flour Blend
1 and ½ teaspoons Xanthan Gum
1 teaspoon Baking Soda
Again, combine all ingredients thoroughly til well-mixed. Then, using a sturdy wooden spoon, mix in
2 cups Chocolate Chips
1 cup broken Walnuts and/or Pecans
Let batter sit for 5 or 10 minutes. Then scoop out onto parchment-lined cookie sheet, leaving a fair amount of space between cookies to allow for spreading room.


Bake for 4 minutes, turn pan half-way, and continue baking for another 4 minutes if you like softer cookies (I pull them out while the center is barely set) or 5-6 minutes for crunchier cookies. Remove from oven and let cool on cookie sheet for 2-3 minutes, then transfer carefully to wire rack and allow to cool completely before storing in a cookie jar, (Note: if you put a slice of gluten free bread in the cookie jar on top of the cookies, it will keep them softer.)


I usually make a tray or two of baked cookies, then scoop the remaining batter into a parchment lined sheet or pan (close together but not touching) and put these in the freezer til frozen solid. Then I place 4 or 6 frozen cookie balls into plastic wrap or zip bags and freeze til needed. This way, I don’t have all those cookies needing to be eaten by me, and should a friend drop by for a cuppa tea or coffee, it’s a cinch to turn on the oven and bake up a few cookies to go along with it. (I’m not going to fib, the frozen doughballs are delightful, too!)